Importing users is a multi-step process. Below are the following steps to import users into the system.
1. Select the import file.
2. Map the fields in the import file to SurePassID directory fields.
3. Select options for the import.
4. Import the users and review the results.
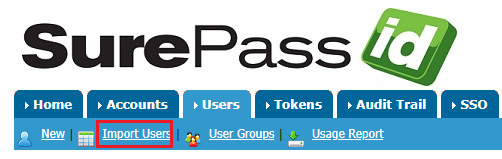
To start the import wizard, click on "Import Users" in the action bar located within the Users folder interface, as illustrated below:
The following form is displayed:
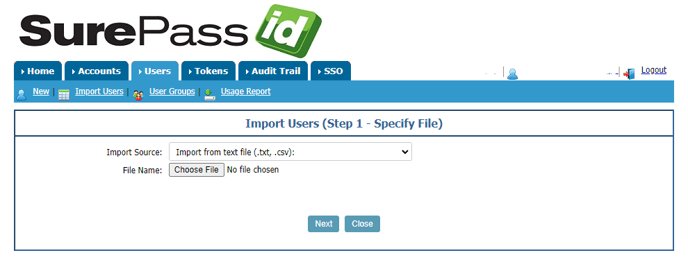
1) Select the import file.
To import users, you need to start by creating the import file. There are various ways to create the CSV import file:
- Manually create the file with user information.
- If you are using the cloud version, you can export Active Directory users with Powershell.
Get-ADUser -Filter * -Properties * | Select-Object -Property Surname,
GivenName, SamAccountName, MobilePhone, EmailAddress | SortObject -Property Name | ConvertTo-CSV
- You can also use the csvde.exe utility to export users. For example:
csvde -f exported_users.csv -r objectClass=user -l sn, givenName, sAMAccountName, mobile, mail
In the Import Source field, choose the option "Import" from a text file (.txt, .csv). Click on the "Browse" button to select the file (*.txt, *.csv) that you want to import. Make sure that the file is formatted with commas separating the data.
2) Map Fields - Click on the "Next" button to proceed to the second stage of the wizard, where you will define how the data fields in the import file are mapped.
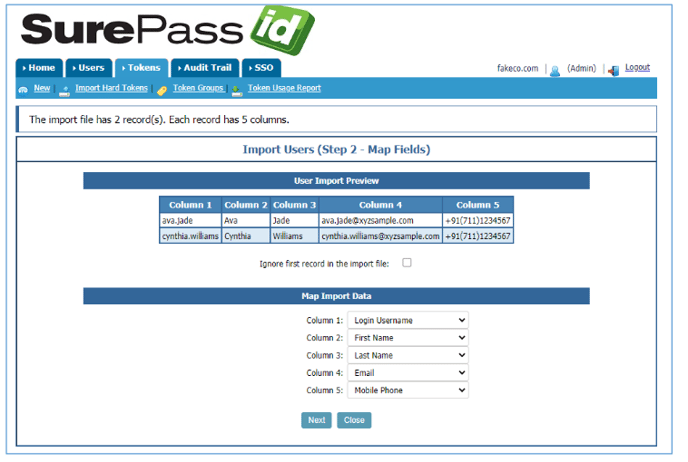
In the "User Import Preview" section, you can view the data columns from the import file. The "Map Import Data" section enables you to link these columns to the relevant fields in the SurePassID directory.
You can map import data columns to the following fields in SurePassID:
- Login User Name – User’s login name.
- First Name – User’s first name.
- Last Name – User’s last name.
- Email – The email of the user. This must be a valid email address.
- Mobile Phone – User’s cell phone. This is required if the user wants to receive passcodes via SMS, or voice call. The format is: +aaa(bbb)cccccccc where aaa is country code, bbb is area code and cccccccc is the local number.
- For example. US: +1(800)200-8411 UK: +44(0)20 1234 5678.
- Serial Number – The serial number of the token that is assigned to this user. (When using import from file)
- PIN – The PIN for this user. Only used for Time and PIN based passcodes. (When using import from file)
Tip: If you are importing users who will receive a hard token, make sure to include the serial number of the token in the import file. However, ensure that you have already imported the hard tokens into the system beforehand.
3) After you have set the fields you plan to map, click the "Next" button and the Import Users (Select Options) form is displayed:
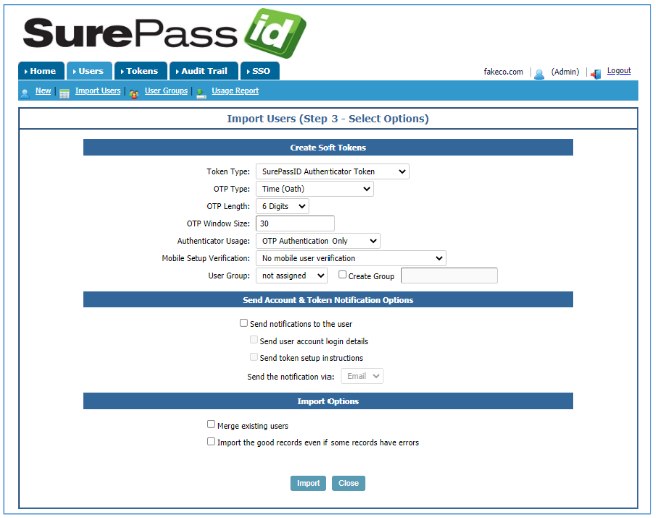
Select from the following options for importing users:
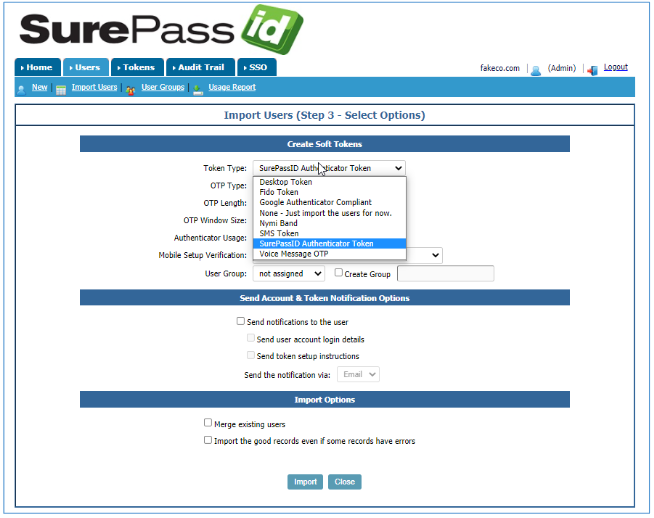
- Desktop Token
- FIDO Token
- Google Authenticator Token
- None - Just import the users for now.
- Nymi Band
- SMS Token
- SurePassID Authenticator Token
- Voice Message OTP
Note: If you choose "None - Just import the users for now" as the token type, the parameters OTP Type, OTP Length, OTP Form, and sending token activation emails to users will be grayed out and not accessible.
OTP Type – The type of the One-Time Password:
- Time (OATH)
- Event (OATH)
- Time + PIN (OATH)
- Challenge Response (OATH)
- 6 Digits
- 8 Digits
- 10 Digits
OTP Window Size –
- For Event (OATH) this parameter specifies the rolling window of the passcode. The typical value is 30.
- For Time (Time, Time + PIN, and Challenge Response) this parameter specifies the number of rolling time periods of the passcode time units in seconds. The typical value is 30 seconds.
User Group – Assign the users to an existing group.
Create Group – Check this box to assign the users to a new group. Enter the name of the new group.
Send notifications to the user (options below):
- Send user account login details – If you check this option, the system will send the user (if an email is specified for the user) directions on how to download and configure the soft token.
- Send token setup instructions - If you check this option the system will send the user (if an email is specified for the user) directions on how to install and activate their token.
- Merge existing users – Update existing user information if user already exists. If the imported user does not exist, it will be added. The SurePassID Login name is used to match the imported user data against existing users.
- Import the good records even if some records have errors – By default, if the system encounters errors during the import, all the imported records are backed out. If you check this box, the system will commit all the successfully imported records and ignore the bad records.
When ready, click the Import button and the Import process will begin. When the import has finished, the following form will be displayed:
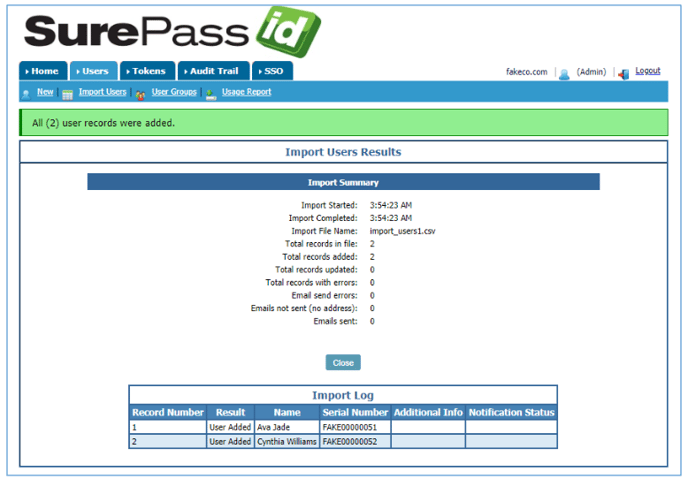
- Import Started
- Import Completed
- Import File Name
- Total records in the file
- Total records added
- Total records updated
- Total records with errors
- Email send errors
- Emails not sent (no address)
- Emails sent
The Import Log Detail provides a detailed overview of each imported record and its processing status within the system. Any errors detected during the import process are clearly highlighted in the Result and Additional Info columns for easy identification and resolution.